[wpfilebase tag=file path='01/SetupDVDDecrypter_3.5.4.0.zip']
This guide is here to help you copying a DVD with CloneDVD. CloneDVD is a tool that will let you copy and compress your movie to the hard disk and then burn it.
Also it's the only program that can let you keep the menus even if you do not select some of the extras.
It is fast and the video that has been compressed has very good quality. Unfortunately CloneDVD cannot unlock copy-protected discs, so if you want to copy this kind of discs (and you are legally allowed to of course) you'll have to use AnyDVD together so that you remove the protection.
Generally CloneDVD is very stable and I could say that it's my favourite DVD copy program and the one that I use most of the time.
But let's start the guide now!
[tab:Step 1]
You should NOT get this picture at any stage of the guide. Well as I told you at the introduction CloneDVD cannot copy copy copy-protected discs. If you want to use it with that type of discs you'll have to use a program that removes them like AnyDVD.
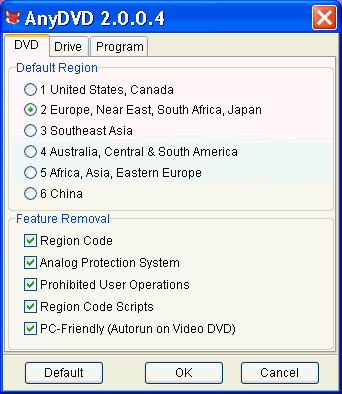
If you have AnyDVD check out that the settings are as shown at the picture. If you don't have it you can use DVD Decrypter to rip the files to the hard disk first and remove the protection.
After you have made sure you use a non-protected source we can continue.
[tab:Step 2]
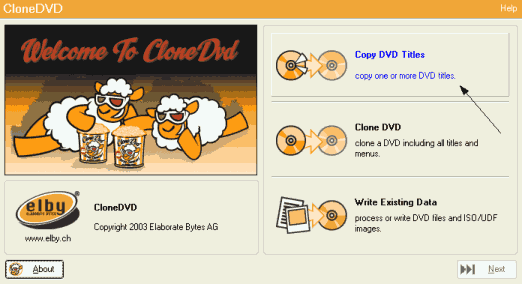
Let's start using that great program. Select Copy DVD Titles. Note that if you have a DVD-5 you can select Clone DVD and copy all of it.
[tab:Step 3]
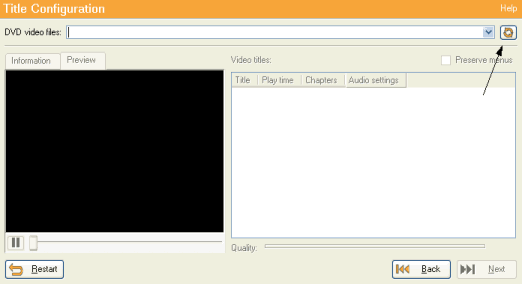
This is the next screen. Just select the button the arrow shows to select our source.
[tab:Step 4]
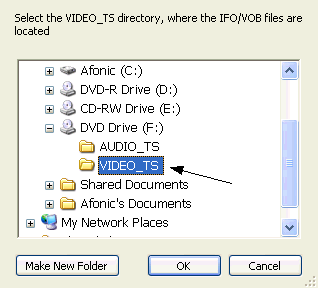
Select the VIDEO_TS folder of your DVD if you use AnyDVD or the folder where you keep your files if you have ripped the files first.
[tab:Step 5]
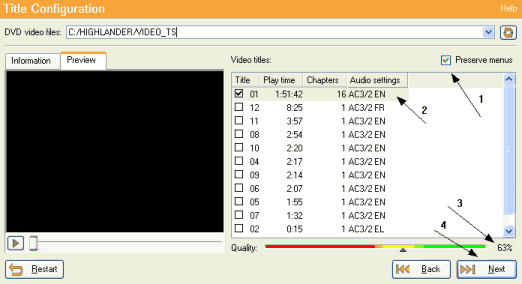
Here are the settings you need to make.
- (1) By selecting this you keep the movies menus. If a menu item lead to a thing you have not copied then it just goes nowhere.
- (2) Select the titles you want to copy , except the main movie you can select as many more as you like. Select them by watching the preview.
- (3) This is the quality. Make sure it's not less than 50-55% and that the arrow doesn't go deep into the read.
Finally click Next (4).
[tab:Step 6]
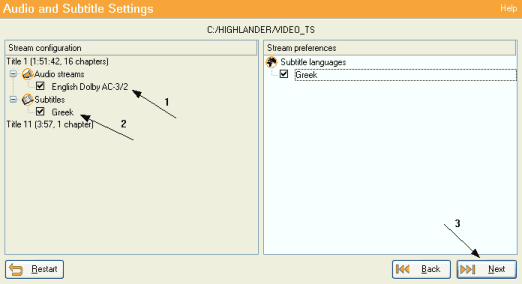
- (1) Here you just select the audio streams you want to use;
- (2) and the subtitles you wish to add at your disc.
After you're done click Next (3).
[tab:Step 7]
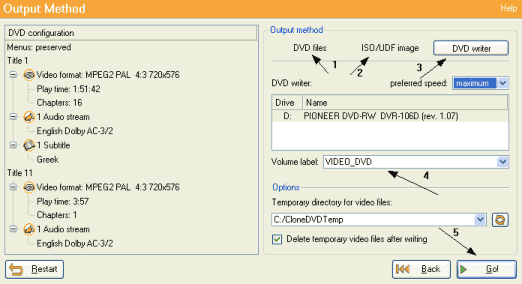
The final screen.
- (1) First you select the output settings.
- (2) Creates files into the hard disk. Creates an [gs ISO image] you can burn afterwards...
- ...and (3) burns the disc.
Of course we are going to select DVD Writer as there is absolutely no reason to select something else (except if you don't have an empty DVD ready).
Then we give the volume name of our DVD (4) and click Go! (5).
Uncheck Delete temponary video files after writing if you want to make other copies.
[tab:Step 8]
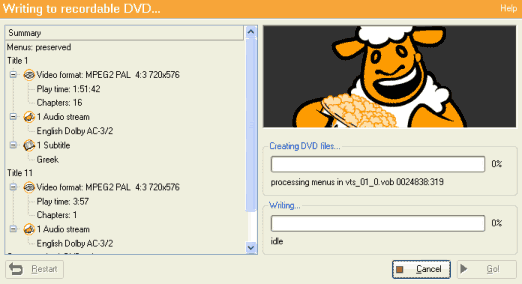
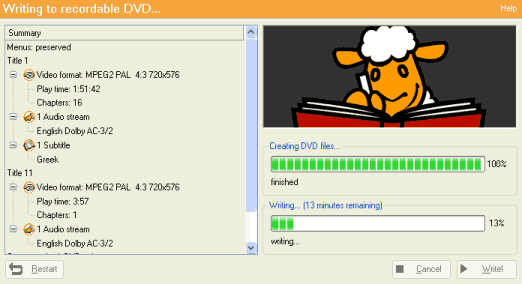
First the program begins to compress the DVD and create the DVD files and...
[tab:Step 9]
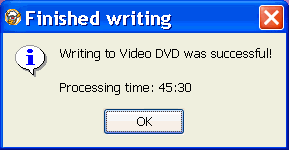
... then it writes them at the blank DVD.
That's it! Well done! Remember to thank us!
[tab:END]
SOURCE | LINK (Dvd-guides.com) | LANGUAGE | ENGLISH |

