 --> (Word) --> (Word) |  --> (PDF) --> (PDF) |  --> (Epub) --> (Epub) |  --> (Text) --> (Text) |
 --> (XML) --> (XML) |  --> (OpenOffice) --> (OpenOffice) |  --> (XPS) --> (XPS) | |
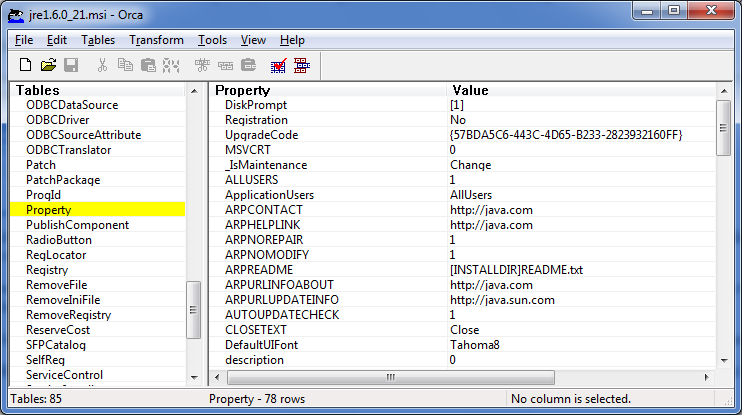
Orca is a [gs database] [gs table] editor for creating and editing Windows Installer packages. In plain English this is a small utility provided by Microsoft to enable you to get inside those useful MSI installer files and edit them to suit your needs.
Not every application comes in MSI format but you will usually find that most software that is designed to be used in the corporate environment will have one. This is to allow applications to be deployed by Active Directory which only supports MSI files.
Often it will not be apparent that the installer is actually an MSI file as it will be wrapped into an executable file (.exe) for easy installation. Sometimes it can take a bit of digging to get the MSI file out if the application doesn’t make one readily available.
The advantage that MSI files have over the standard (.exe) versions of the installers is that it allows us to have much more control over the installation and force it into silent mode to get the job done without disturbing the end user. We can also use the logging function of MSIEXEC to to give us better visibility of the installation results. Some executable installers will support silent command line switches anyway but in my experience they don’t always work as desired. Best to test in your environment if you’re not sure.
Installing via MSI file using the MSIEXEC tool is normally pretty well behaved when running from the Local System account as well whereas some .exe files have trouble running smoothly from here. Various things can cause failures from this account but a common one is that the folder locations that the installer may want to extract to temporarily is not present when running as NT AuthoritySystem (possibly because it references a user name in the path).
Better to make it explicitly clear to Windows what we want it to do rather than let it try to make up it’s own mind (which can be a bit hit and miss!).
I’m going to use Java as an example here to show you how this could be of use.
After downloading the latest Java installation file from Sun (jre-6u21-windows-i586-s.exe in this case) and running the installation on a Windows 7 test rig, I was able to find the MSI file for the installation in the following folder:
C:\Users\{username}\AppData\LocalLow\SunJava\jre1.6.0_21As I mentioned before, you may have to poke around a bit to find these files but AppData is a good place to start in modern O/S’s and failing that you could call on good old Google for help. In my case the Installation folder looked like this:

You will notice here that it’s not just the MSI file that has been extracted from the installer but others as well. These are all important to the installation and we will be zipping these all up together when we have finished in order to [ gs deploy] them to our devices.
The two files that we are really interested in here are jre1.6.0_21.msi and sp1033.MST. The MSI file is the Windows installer file itself whereas the MST file is what is known as a Transform file. This allows customizations to be applied to the relevant MSI file and transform it in some way, hence the name.
It’s always a good idea to back up these files somewhere before you begin messing around with them in case you want to revert to a [gs vanilla] version if something goes wrong.
Now we have our source files you could just use the MSI files as they are but the idea of this post is to demonstrate how they can be modified with Microsoft Orca.


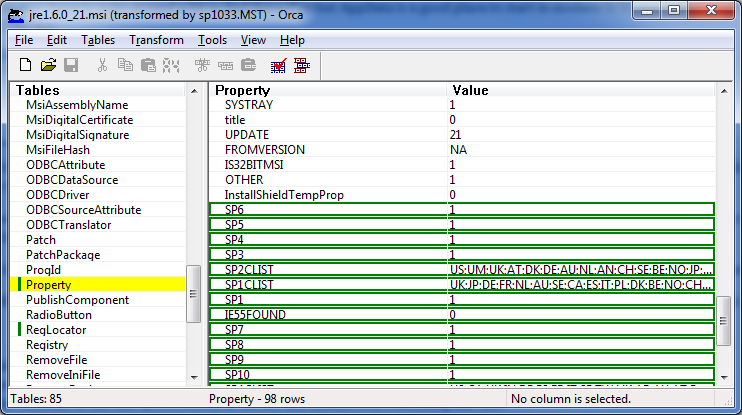
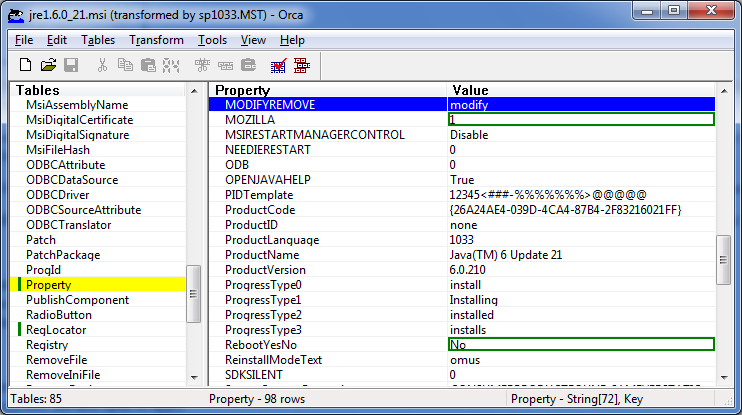
In our case I simply want to edit a few fields in the Property table (JAVAUPDATE=0, MOZILLA=1, IEXPLORER=1 and REBOOT=No). The eagle eyed among you will notice that these are exactly the same as the command line switches in this case.
These settings ensure that the installation registers with Internet Explorer and plug in [gs browser]s like Firefox as well as disabling Java Update and suppressing an automatic reboot. Simply edit the values in the right hand column and you will see the green highlights appear on the fields that you have changed.

Once this has all been done you have everything that is necessary to perform the deployment. So you can close Orca and delete the original sp1033.MST transform file from your source directory. Then zip the contents of the [gs directory] up into a self extracting zip file (jre1.6.0_21.exe in my case) using Peazip (not the folder itself but just the files inside).
SOURCE | LINK (scriptingsimon.com) | LANGUAGE | ENGLISH |

