To totally unlock this section you need to Log-in
Login
In a Windows operating system, it is a safe practice to always use the “Safely Remove Hardware and Eject Media” to eject a plugged in USB flash drive instead of directly pulling it out to prevent any opened files from being corrupted.
Doing this will also trigger Windows to enable the dirty bit on the flash drive where Windows will automatically prompt to scan the drive for error the next time you plug it in. If Windows found corrupted files during check disk, it will simple convert them into .CHK files that can only be recovered via third party tools.
Although Windows provides a safe and convenient way to safely eject your USB flash drive, there are no options to easily remount or reconnect the ejected drive. It seems like the only way is to unplug the drive and reinsert it into the USB port for Windows to re-detect and re-mount the USB flash drive. This can be very troublesome if the device is connected to the USB port located at the rear of the computer.
NOTE: all software will have a direct link to the software developer's page, and a mirror link at the bottom of this article.
DevEject
DevEject is a simple software that can be configured to replace the Safely Remove Hardware and Eject Media in Windows. It has the ability to eject, unplug, detect files in use that prevent the device from ejecting, and hotkey support.
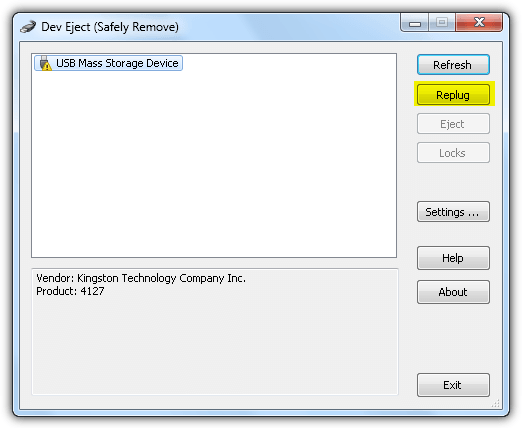
To remount an ejected USB drive, simply select the device from Dev Eject and click on the Replug button which we’ve highlighted in the screenshot above. The replug feature worked perfectly when tested in Windows XP and Windows 7 but not in Windows 8.1 as the program kept on crashing. Although Dev Eject comes in a setup installer, you can actually copy the program folder to another computer and use it without reinstalling.
HOMEPAGE: http://deveject.com/
Disable and Re-enable USB Mass Storage Device
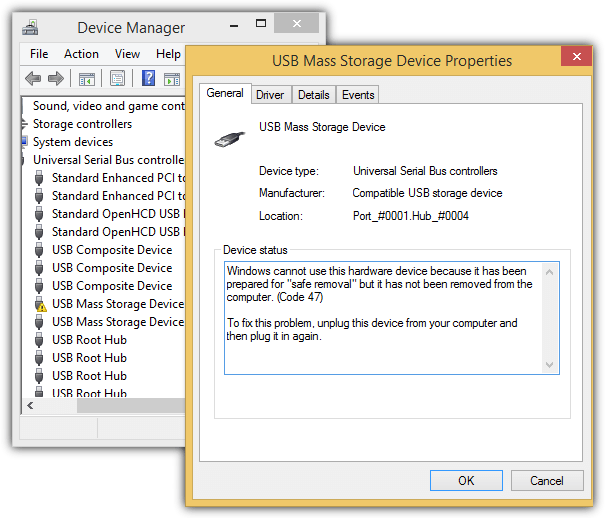
This second method is a manual way of remounting an ejected USB device without relying on a third party software. When you’ve ejected a USB flash drive, the device icon will be shown with a yellow exclamation mark in Device Manager with the message saying “Windows cannot use this hardware device because it has been prepared for safe removal but it has not been removed from the computer (Code 47)”.
To access Device Manager, press WIN + Pause/Break keys to bring up System and click on Device Manager from the left pane.
For Windows XP, all you need to do is right click on the device, select Disable and click Yes to confirm. Right click on the device again, this time select Enable and you’ll notice that Windows will start to re-detect and remount the USB drive.
For Windows 8.1, do the same as above and make sure you click on No when prompted to restart your computer after selecting Enable. Repeat the steps of disabling and enabling the device one more time and again click on No when asked to restart. Amazingly Windows 8.1 remounts the ejected Drive after cycling the disable and enable twice. Strangely this method does not work on Windows 7.

You can automate this task automatically using a batch file with devcon.exe. DevCon is a command line utility that can perform a number of actions such as enabling and disabling a device in Device Manager. You can download devcon.exe from the Download zone at the bottom of this article, extract and use the build (either 32-bit or 64-bit) according to your Windows architecture.
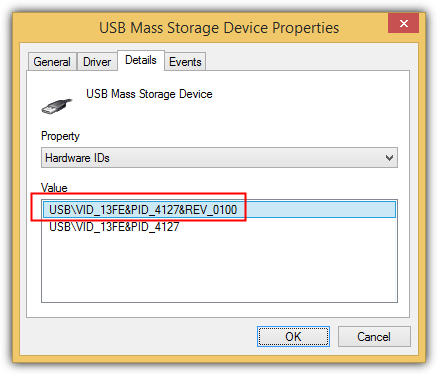
First you’ll need to find the Hardware ID of your USB flash drive from Device Manager. Double click on the USB Mass Storage Device, go to Details tab, and select Hardware IDs from the Property drop down menu. Note down the value of your USB device.
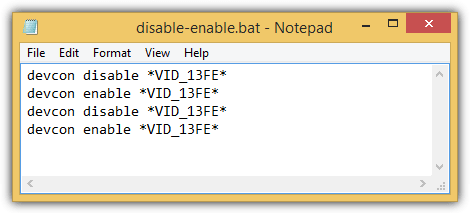
Copy the 4 lines below and paste it into Notepad. Replace the values of *Your_PARTIAL_HW_ID* according to your device’s hardware ID.
devcon disable *YOUR_PARTIAL_HW_ID*


devcon enable *YOUR_PARTIAL_HW_ID*


devcon disable *YOUR_PARTIAL_HW_ID*


devcon enable *YOUR_PARTIAL_HW_ID*
You can either enter full or partial hardware ID depending if you have another device with the same vendor ID. As you can see from the screenshot below, we used a wildcard on VID_13FE because we know that there is no other device with the hardware ID VID_13FE other than our USB flash drive.
Place the batch file together with devcon.exe. Whenever you run the batch file, it will automatically enable and disable your USB device twice to force Windows 8.1 to remount your ejected USB flash drive.
Uninstall USB Root Hub
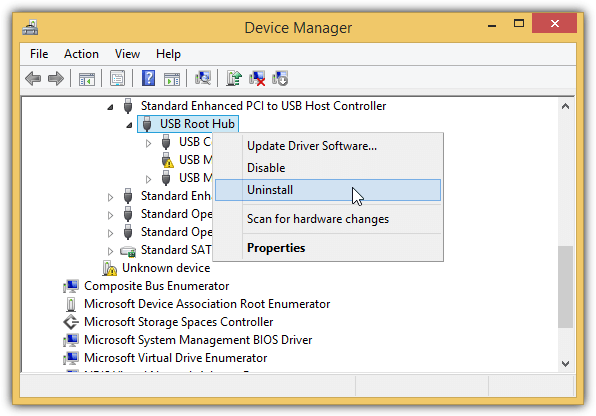
Uninstalling USB Root Hub and reinstalling it again can also trigger Windows to remount an ejected USB flash drive. The steps are quite similar to the second method and it works on Windows 7. First you need to eject the drive, then go to Device Manager by pressing WIN + Pause/Break keys and click on Device Manager at the left pane. Click on View menubar and select Devices by connection.
Locate the USB Mass Storage Device with a yellow exclamation mark, right click on the parent “USB Root Hub” and select Uninstall.
If you’re using Windows 7, click on the Action menu bar and select “Scan for hardware changes”. This will force Windows to register and reinstall any USB devices under the USB Root Hub that you’ve uninstaller earlier. If you’re on Windows 8.1, Microsoft has made it so much easier because Windows will instantly remount your USB device after uninstalling the USB Root Hub.
Unlike disabling and re-enabling a USB Mass Storage Device, you won’t be asked to restart your computer but if you have another device such as an ADSL modem connected to your USB port, then it might get disconnected when you uninstall the USB Root Hub. The devcon command is also much simpler because you don’t really need to identify the hardware ID that you want to uninstall. Use the command below:
devcon remove *root_hub20*
For Windows 7, you’ll need to add a second line to rescan for hardware changes.
devcon rescan
A ready made batch file to remove the USB Root Hub and rescan for hardware changes has been made available for you which can be downloaded from the link below.
Download
To display and download the files attached to this article you will need to register and/or login on HeelpBook. Take it easy, it's totally free and fast. :-)
[wpfilebase tag="file" id="203"]
[wpfilebase tag="file" id="204"]
[wpfilebase tag="file" id="205"]
[wpfilebase tag="file" id="206"]
 |  |