To totally unlock this section you need to Log-in
Login
This section will be of interest to an administrator who is familiar with security settings on a FAT32 volume where permissions for a shared folder are the only permissions protecting files and subfolders in the shared folder.
When using share permissions and NTFS permissions together, if there is a conflict in the configuration, the most restrictive permission prevails. For example, if a user has NTFS full access to a specific file in a folder that is not shared, the user cannot access the file from the network. In this case, the user can sit down at the computer that contains the file, log in and access the file, because sharing permissions do not affect local access.
One strategy for providing access to resources on an NTFS volume is to share folders with the default shared folder permissions and then control access to shared folders by assigning NTFS permissions. When you share a folder on an NTFS volume, both shared folder permissions and NTFS permissions combine to secure file resources.
Shared folder permissions provide limited security for resources. You gain the greatest flexibility by using NTFS permissions to control access to shared folders. Also, NTFS permissions apply whether the resource is accessed locally or over the network.
When you use shared folder permissions on an NTFS volume, the following rules apply:
- You can apply NTFS permissions to files and subfolders in the shared folder. You can apply different NTFS permissions to each file and subfolder that a shared folder contains.
- In addition to shared folder permissions, users must have NTFS permissions for the files and subfolders that shared folders contain to gain access to those files and subfolders.
- When you combine shared folder permissions and NTFS permissions, the more restrictive permission is always the overriding permission.
Conflicting Permissions
Windows uses both sets of permissions -- shared and NTFS -- when determining whether someone can access or make changes to a folder and its contents. If two of the settings conflict with each other -- for example, the shared permission setting for Read is set to "Allow" and the NTFS permission setting is set to "Deny" -- Windows enforces the more restrictive setting. In the aforementioned example, the user in question would be unable to read the folder's contents due to the NTFS setting being set to Deny.
Change Permissions
If you find working with two separate sets of permissions to be too complicated or time consuming, you can switch to only using NTFS permissions. To do this, the share permissions for the folder in question must be changed to "Full Control". You can then make whatever changes you want to the NTFS permissions without having to worry about the share permissions interfering with your changes.
To change share permissions, right-click the desired folder, select "Properties", open the "Sharing" tab, click "Advanced Sharing" and then click "Permissions". Select a user or group from the list and then select the "Allow" or "Deny" check box next to each of the share permission settings.
To change NTFS permissions, open the "Security" tab in the folder's Properties dialog box, click "Edit", click the user or user group you want to change permissions for and then select the "Allow" or "Deny" check box next to each of the NTFS permission settings.
Planning
The first step is planning how folders will be shared. To do this, make a list of what data will be stored and what user groups will require access. For example, types of data may be employee data, customer account status data, customer service data, management guideline data, and so on. Groups of users may be managers, administrators, sales reps, customer service reps, and so on.
Create a table with three columns:
- Column 1 displays each data folder by name and location
- Column 2 displays the shared folder name
- Column 3 displays the name of the user group with assigned folder permissions
File and Printer Sharing for Microsoft Networks
To share any folders or other network objects, you must have "File and Printer Sharing for Microsoft Networks" as a networking component in your local area connection.
To add this component:
- In the Windows System Tray, right-click the Local Area Connection icon and choose Status from the context menu. The Local Area Connection Status dialog box appears.
- Click Properties. The Local Area Connection Properties dialog box appears.
To add the File and Printer Sharing for Microsoft Networks check box, click Install... and choose it from the Services category. Select the File and Printer Sharing for Microsoft Networks check box and click OK.
Allow vs. Deny Permissions
When establishing permissions, you need to specify whether the entry should have access (Allow) or not have access (not Allow) to the resource.
After permissions have been set, the LSASS (Local Security Authority) controls access to the resource. LSASS compares the SID (Security ID) that you placed on the ACL (Access Control List) with the SID placed on the security access token that is given to the user at logon. If the SID associated with the user is on the ACL, the LSASS must determine whether the access is set to Allow or Deny. The Allow and Deny permissions inherit down through the structure.
Use the Deny permission sparingly, because of the fact that restrictive permissions override lenient permissions. It is more common to clear all the Allow check box for a group, thereby removing the group from the ACL.
This has the same result, giving no access to the resource. "Not-Allow" access in this way is easier to troubleshoot, manage and configure. It is easy to forget that you have used the Deny option.
You deny permissions (using explicit Deny) only to a specific user when it is necessary to override permissions that are otherwise allowed for the group to which this user belongs.
Inheritance
What we’ve discussed so far all applies to the shared folder itself, which permissions you have, or don’t have, within that particular shared folder. Your effective permissions on the shared folder determine if you, for example can create, rename or even delete folders, to name a few. In most cases ‘normal’ users will have Read permissions and Administrators will have Full Control or something alike to create and manage folders etc… Although there are multiple ways in setting up these kind of structures, and better ones for sure, I’ll keep it simple to give you an idea on the possibilities and possible pitfalls.
By default, when an Administrator creates a sub folder within a shared folder this folder will inherit the NTFS permissions from it’s parent folder, being the shared folder. Hmmm nice sentence. It doesn’t do anything with the share permissions. So when ‘Everyone’ or your ‘Domain Users’ have effective Read permissions on the shared folder it’s important to know the combination of permissions that are applied, here’s why:
Remember that the effective permissions that get applied on a shared folder are the most restrictive found, see above. If you apply Full Control share and Read NTFS permissions the sub folders created by your Administrator will inherit the Read NTFS permissions, not to bad right?
But if your effective Read permissions come from a combination where you grant Read share and Full Control NTFS permissions, the same rules apply. The newly created sub folders will inherit the Full Control NTFS permissions, meaning that your shared ‘root’ folder is still safe because only Read permissions get applied but the sub folders now have the inherited Full Control NTFS permissions, not something you want and that’s an understatement.
Hidden
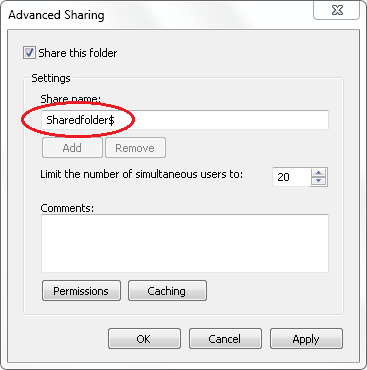
Shared folders can be made hidden by adding the $ sign at the end of the share name, like: sharedfolder$ this way it’s still accessible if you have the proper permissions just not visible by default. You’ll have to use the full share name $ sign included.
When you install an Microsoft Server Operating System it automatically creates several hidden administrative shares, if you want to or not # Admin$ – This is the system root, usually C:\Windows, Administrators are assigned Full Control share permissions to C$, D$, E$ – Each volume on a hard disk is shared by default and provides easy access of the entire volume to Administrators.
Administrators are assigned Full Control share permissions to IPC$ – Allows named pipes connections - and to Print$ – Created when printers are shared and allow clients to automatically download the printer drivers.
 |  |