To totally unlock this section you need to Log-in
Login
Setting up Virtual Private Network (VPN) connections to your office is becoming more common as work from home jobs expand. Typically the IT guy at your work should be able to provide you the necessary information needed to connect to your office securely such as IP address to connect to, username, password, and possibly domain. Once you make the VPN connection it will be as if you are working on a computer at the office so you can use things at the office such as network printers, file servers, etc.
Before you can set up the incoming VPN connection, you need to first configure your network router so that it knows which computer it has to forward all VPN traffic to. Log in to the router's control panel—it's usually as simple as opening up a Web browser and typing in 192.168.1.1 (or whatever IP address your router has)—but refer to the router's setup instructions from the manufacturer for more details.
Once you are in the router's control panel, configure port-forwarding or virtual server settings so that port 1723 has the IP address of the Windows computer you are setting up VPN on. You can always get the IP address of the Windows computer by typing ipconfig at the command prompt.
By default, most routers have PPTP or VPN pass-through options enabled in its firewall settings. It's worth checking to make sure it's turned on before closing the router settings page.
Setup A VPN Connection On A Windows 7 Computer
Windows 7 Control Panel: To begin the creation of a new Windows 7 VPN connection you should open the Windows 7 Control Panel by clicking on the Windows icon in the taskbar and selecting Control Panel from the pop up menu. This will launch the Windows 7 Control Panel.
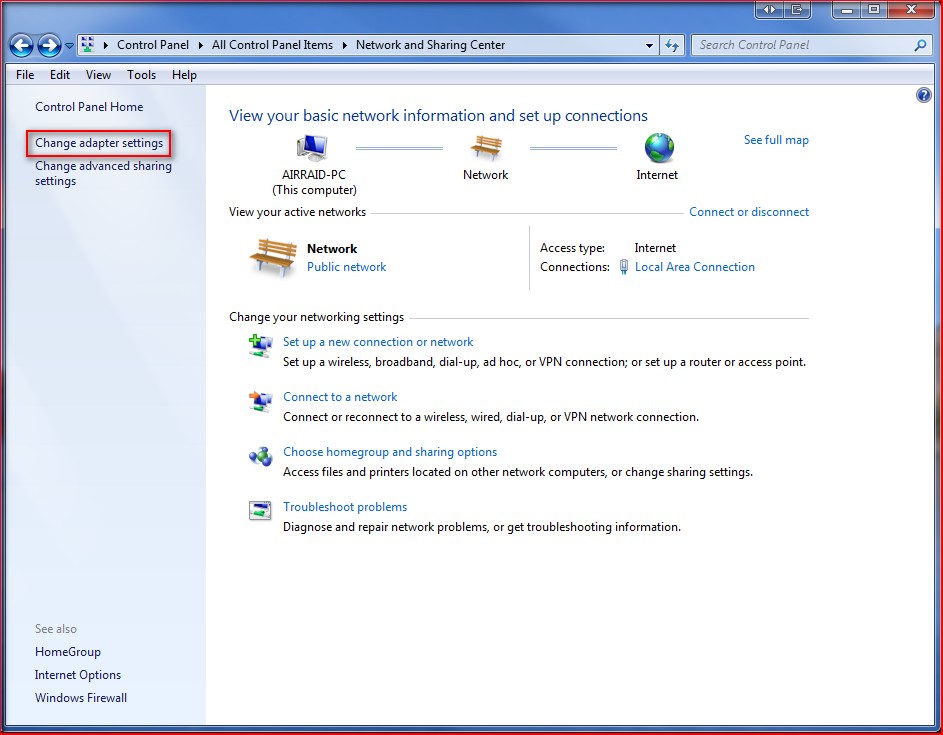
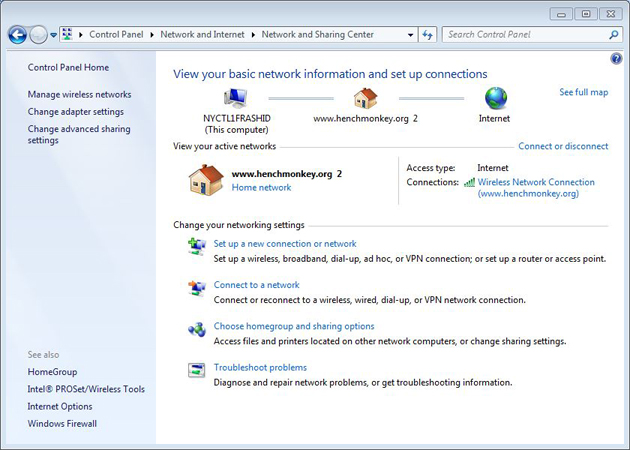
Open up the Network and Sharing Center (under Control Panel, Network and Internet) on the Windows 7 computer that will accept incoming VPN connections. Look for the sub-heading "Change adapter Settings" on the left-hand side of the screen. You can also get to this window by typing "Network and sharing" from the search bar under the Start menu.
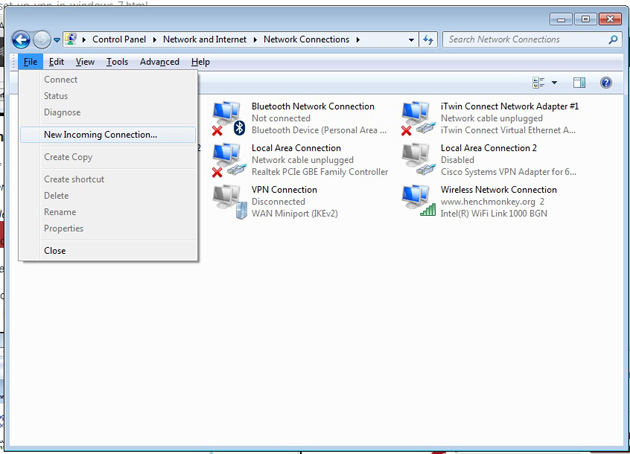
In the "Change Adapter Settings" windows, you will see adapters showing wireless connections you've already configured on the computer, VPN connections, and the regular network adapter that is installed on the computer. Click on the File menu and select "New Incoming Connection".
If you don't see the File menu, hit ALT-F to open the menu.
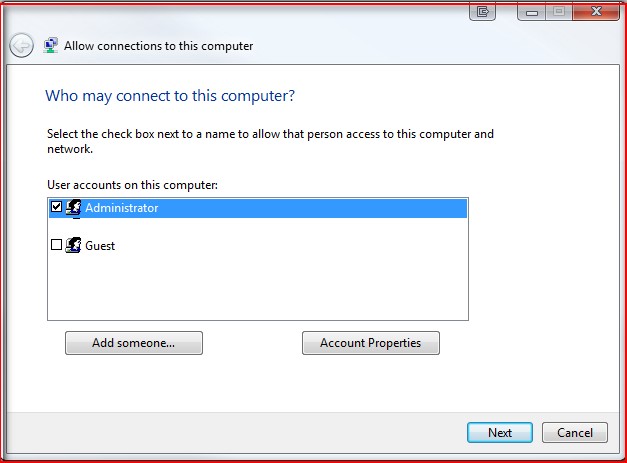
Select all the user accounts that can access this computer. You can even create new accounts using the "Add someone..." option.
After selecting the users, you will be asked how people will connect to the computer. Select the "Through the Internet" checkbox.
In the next window asking about network protocols, most people will just need to set up only the TCP/IPv4 connection. If your computer is on an IPv6 network, or if you know users will be coming in via IPv6, then you can enable that as well. You should make it a point to uncheck (turn off) "File and Printer Sharing" as keeping it enabled will allow the remote user to access other resources on the network.
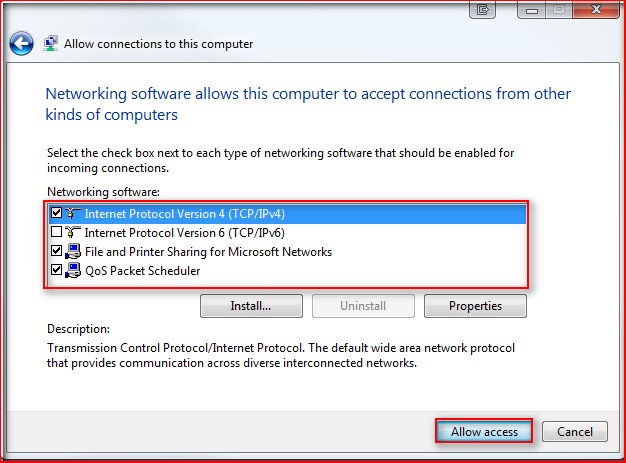
If you do want the remote guest to be able to jump from your computer to another, or to use the printer, then keep it turned on, but think carefully before making that decision.
TIP: Default selections (Recommended): Internet Protocol Version 4 (TCP/IPv4), File and Printer Sharing for Microsoft Networks and QoS Packet Scheduler. You should have at least TCP/IPv4 selected to successfully accept connections. Highlight the protocols for their descriptions.
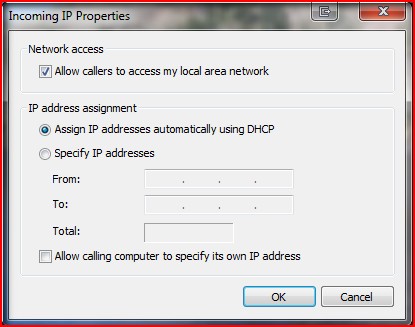
To allow the client access your LAN resources, highlight Internet Protocol Version 4 (TCP/IPv4) and click on Properties. Put a check mark on Allow all callers to access my local area network. Here you can have the IP assigned automatically, assign IPs following your LAN segment format or let the client assign its own IP address.
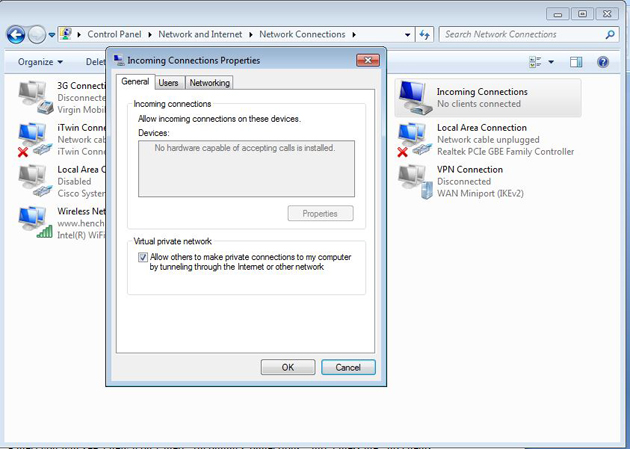
You will see a confirmation message that the incoming VPN connection has been created, with the name of the computer name the remote user will need. The remote user will enter that computer name when creating the outgoing VPN connection on their own computer.
If you go back to the adapters list in "Network Connections", you will now see the connection that you just created, and the message "no clients connected". When remote users connect successfully, this message will change.
And that's it! Now you are able to have remote users connect to your computer securely, and you can create secure VPN connections to other computer as well.
Connect to a VPN server
In the Network and Sharing Center (under Control Panel, Network and Internet), there is an option to "Set up a new connection or network". The next option is to click on "Connect to a Workplace" in order to start the connection wizard, and then select "Use my Internet connection (VPN)" option to begin the process.
If you have a 3G card installed, you may first see a prompt to use the 3G card instead of creating a "new" connection. In this case, you want the "new" connection so that you can use your existing Internet connection (yes, it's a little confusing).
A far easier way to get to this point is to click on the Start button and type "VPN" in the search box. It will jump straight to the "Set up a virtual private network (VPN) connection" window in the wizard.
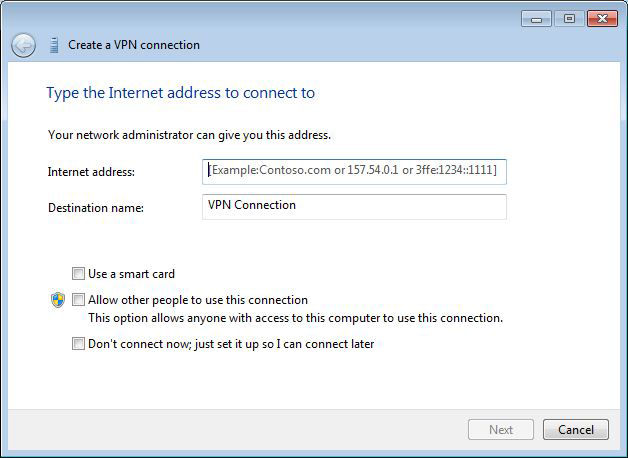
In the Internet address field, enter the IP address of the VPN server or the network's domain name. This information will usually be provided by the network administrator. If you are connecting to the home router, then you would put in the IP address of that router.
The destination name field displays the name users would see. If you aren't going to connect right away, select the "Don't connect now; just set it up so I can connect later" checkbox.
Leaving it unchecked means the client will try to make a connection at the end of the wizard. If there are multiple users on the Windows 7 box, you can either check off "Allow other people to use this connection" to make the VPN connection available to others, or leave it unchecked to ensure no one else has the option.
This screen asks for a username and password. If you leave it blank, you will be prompted to enter the information when making the actual connection.
The final window, if you selected "Don't connect now", will display a "Connect now" option. You can close the window now, or connect.
When you are ready to connect, just click on the network icon in systray (the icon could be for the wireless network or for the wired one) and the connection that was created earlier would show up in the list under "Dial-up and VPN". You can also get here by clicking on "Connect to a network" under Network and Sharing Center.
In the VPN connection box, enter the username and password to the VPN network, if it isn't already pre-populated, along with the domain provided by the administrator. This connection should work for a majority of VPN networks.

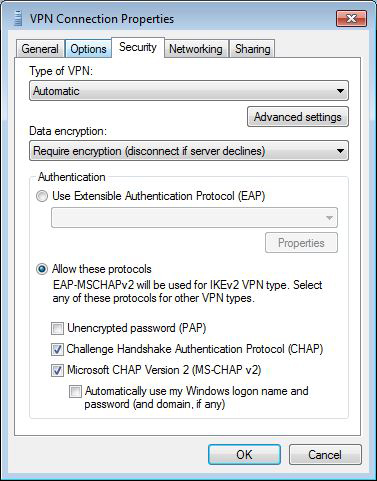
If the connection fails, click on Properties. The most common issue has to do with the server configuration. Select the "Security" tab in the Properties window.
"Type of VPN" should be set to Automatic. Check with the administrator if it should be set to PPTP, L2TP/IpSec, SSTP, or IKEv2. If it still doesn't work, it's possible you should uncheck "Include Windows logon domain" under the Options tab.
After saving the properties, select Connect to launch the connection. You are now connected to a VPN server and your connection is safe.
 |  |