To totally unlock this section you need to Log-in
Login
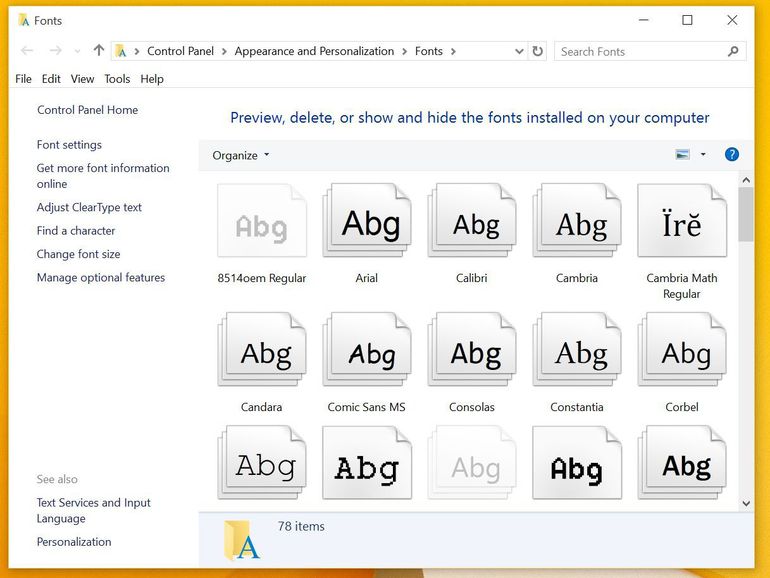
Managing fonts in Windows 10 is not so difficult, once seen the procedure on how to add, remove and modify them. Let's begin saying that in latest Windows 10 builds you will need to open the Fonts Control Panel by opening the following folder: C:\Windows\Fonts.
Once opened this folder will show us a similar window:
The procedure to add new fonts in Windows 10 is easy: holding a left-click on your font file, just drag the TrueType font file to the opened Fonts folder's window, that actually contains all others installed fonts. Releasing the drag over this folder will make begin an "Installing font..." message, and, within few seconds, the font will be listed inside the Fonts folder.
NOTE: there is no "Add Font..." button available on Windows 10 to add fonts with a typical Browse... window.
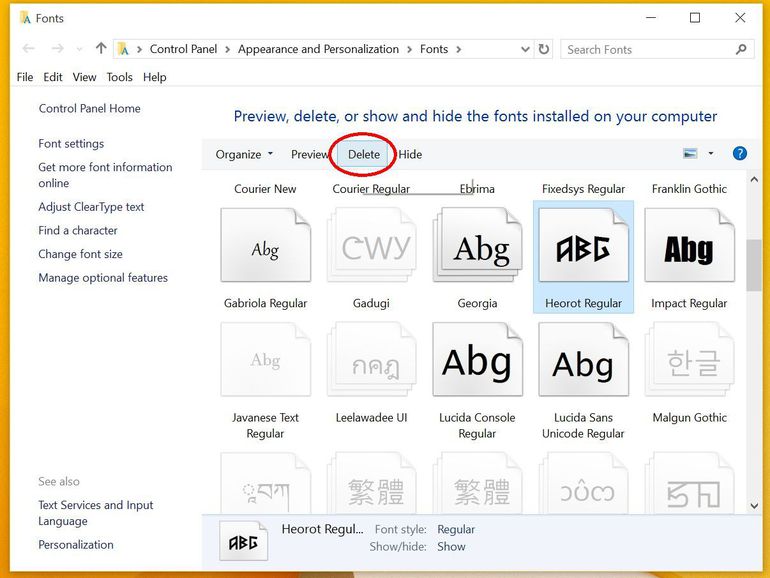
The deletion process of a font is a bit easier: select the font you want to delete....and then click the Delete button on the menu displayed in Fonts folder.
IMPORTANT: do not to remove any important system fonts like Calibre, Microsoft Sans Serif and Tahoma.
Increase and Decrease Font Size
If you want to make changes for system font settings, you will need to click over the Change Font Size text link accessibile on the left toolbar of the Fonts folder.
After you open this section you will be provided with a simple menu in which you'll can choose the item you want to change and finally select a size and/or select also the Bold option if you want to see OS text and menus in Bold mode.
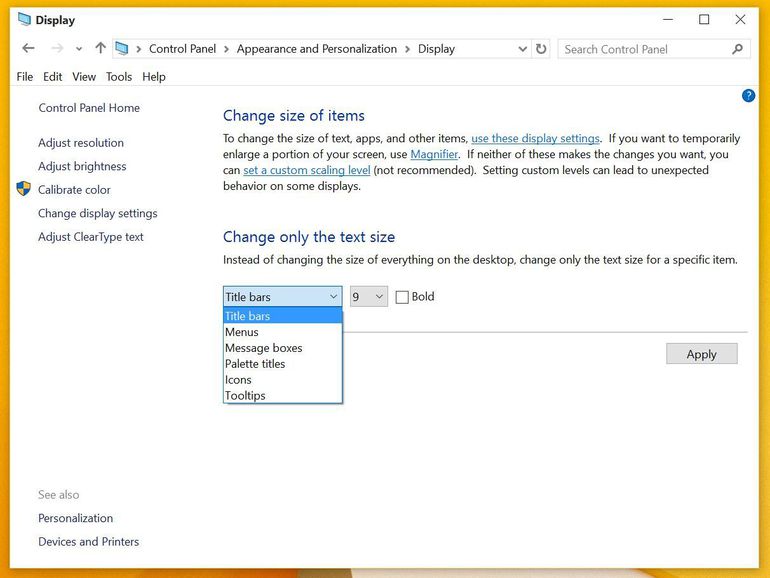
Finally, when you will click the Apply button, you'll notice the changes in seconds (without the need of a system restart).
 |