To totally unlock this section you need to Log-in
When you have too many people using your PC, or you want to keep an account secret, use this guide to hide user accounts from the Windows 10 sign-in screen.
Sharing your computer with other people is not so safe, so Windows 10 by default will list every user account on the sign-in screen.
However, there could be times when you may have some additional accounts that you don't want listed. For example, accounts for users who only login remotely to their PCs, or an account that you want to keep secret from regular users.
While the operating system doesn't offer an option to pick which user accounts appear on the sign-in screen, you can easily hide any user from being listed by modifying the Windows Registry.
Important: Before you make any changes, make sure to understand that you'll be modifying the Windows registry, which could be a dangerous game that can cause irreversible damage to your computer when changes are not done properly. It's recommended that you do a full backup of your system before proceeding. You've been warned!
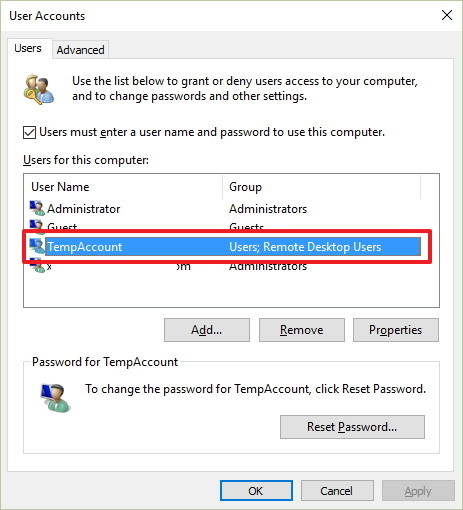
Windows 10 by default displays the full name on a user on the sign-in screen, but to make this work you'll need the name of the account. You can find this information by opening Local Users and Groups.
However, this option is only available for Pro users, as such we'll be using the old User Accounts manager that is available on Windows 10 Pro as well as on Windows 10 Home.
- Use the Windows key + R keyboard shortcut to open the Run command, type netplwiz, and click OK to open User Accounts.
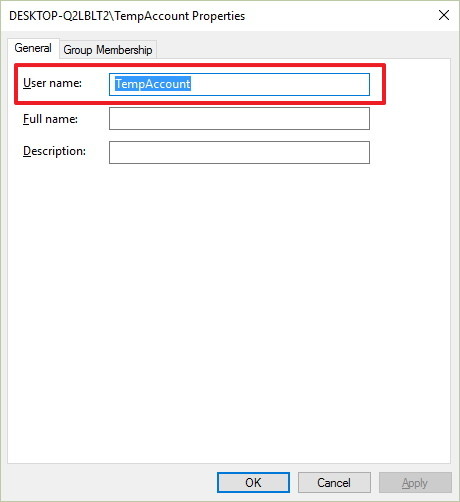
- Select the account you want to hide and click Properties.
Make note of the User name for the account.
Use the following steps to hide an account from sign-in screen on Windows 10:
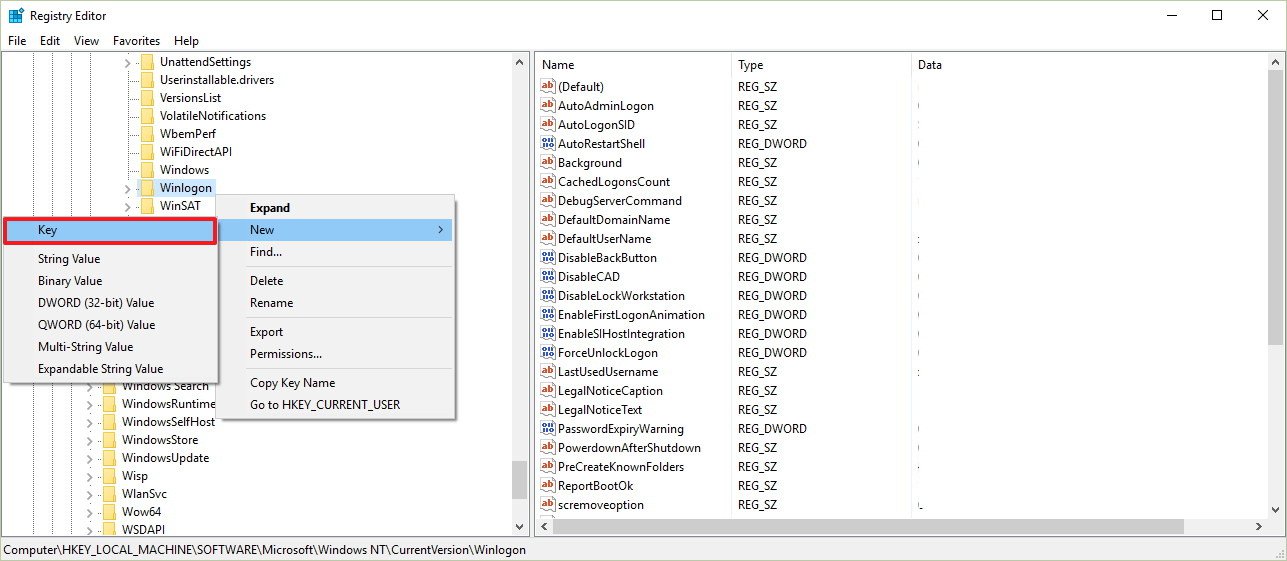
Use the Windows key + R keyboard shortcut to open the Run command, type regedit, and click OK to open the Windows Registry. Browse the following path:
HKEY_LOCAL_MACHINE\SOFTWARE\Microsoft\Windows NT\CurrentVersion\Winlogon
Right-click the Winlogon, select New, and click Key and name the new key SpecialAccounts
.
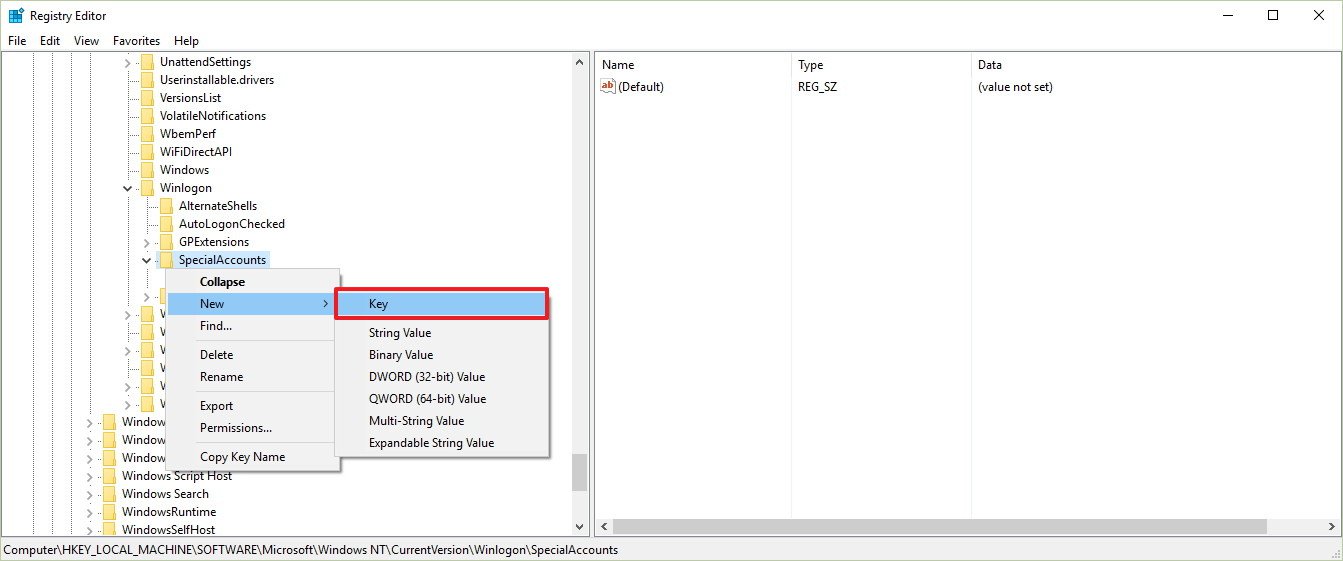
Right-click the SpecialAccounts key, select New, and click Key and name the new key UserList.
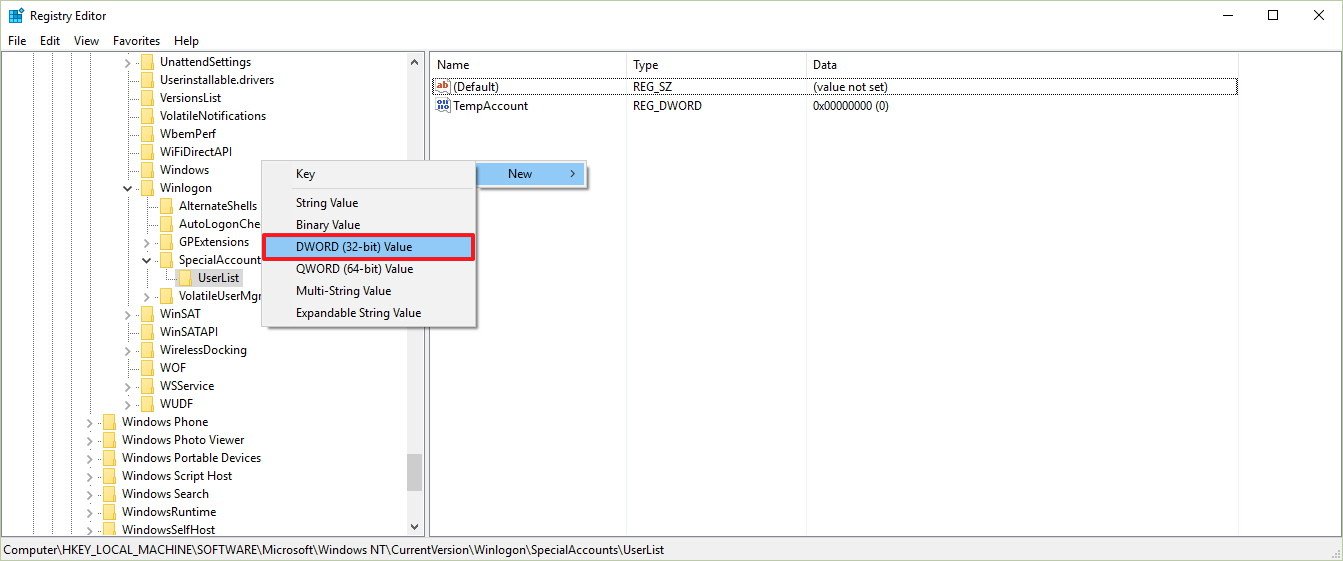
Inside of UserList, right-click, select New, and click DWORD (32-bit) Value.
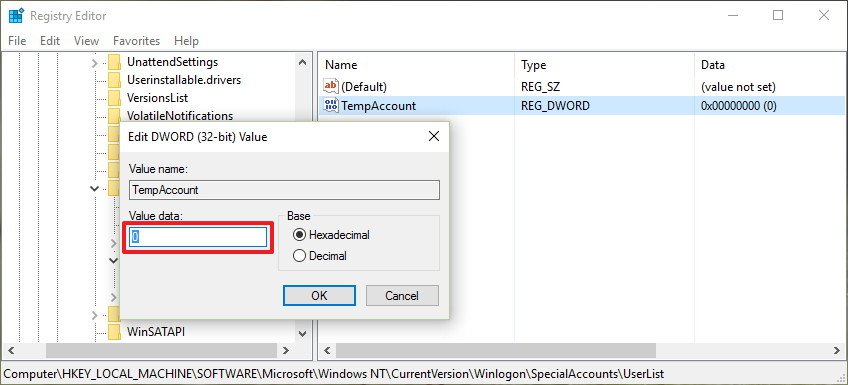
Name the new DWORD key with the name of the account you're trying to hide, s double-click the new DWORD key and make sure its data value is set to 0.
Sign-out and you'll now notice that the account will no longer be available on the sign-in screen. In fact by doing this, you're also hiding the account from virtually everywhere in the operating system, including the from the switch user menu in the Start menu, from Control Panel, and even from the Settings app.
In order to make a hidden account visible again, you'll have to go back to the registry UserList key using the steps mentioned above, and making sure to change the user name data key value from 0 to 1.
If you're only hiding a remote user account, you don't need to do anything else, as the user can login remotely without any issues.
Keep in mind that while this guide will help you to remove user accounts from the sign-in screen, it's not recommended to remove all the accounts, including your own, as you may find tough to get back in.
To remove Userlist key
Copy and paste the following into an Administrator: Command Prompt and press Enter key:
REG DELETE "HKEY_LOCAL_MACHINE\SOFTWARE\Microsoft\Windows NT\CurrentVersion\Winlogon\SpecialAccounts\UserList" /f
To remove SpecialAccounts key (which will also remove any sub-keys; i.e. UserList)
Copy and paste the following into an Administrator: Command Prompt and press Enter key:
REG DELETE "HKEY_LOCAL_MACHINE\SOFTWARE\Microsoft\Windows NT\CurrentVersion\Winlogon\SpecialAccounts" /f
